If you’re running a Shopify store, having Google Analytics installed is a must. Without it, you’re guessing where your customers come from, which products they like, and how to improve sales.
But here’s the problem: many store owners install Analytics through extra apps, and these apps often slow down their website. A slower store means fewer conversions.
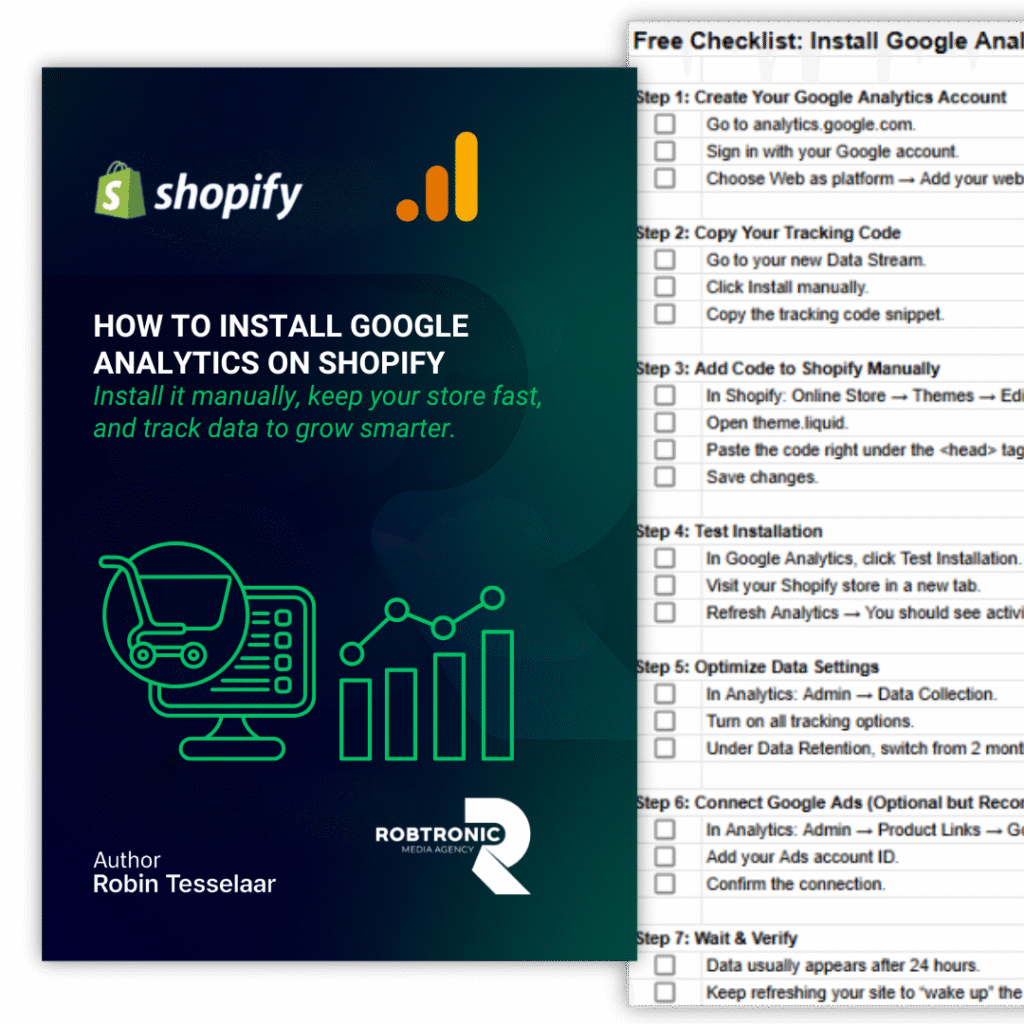
The better way? Install Google Analytics manually. It takes just a few minutes and keeps your store fast and clean.
In this article, we’ll walk through the key steps and explain why they matter. At the end, you can grab a free one-page checklist that shows you exactly how to set it up on your own store.
Why Google Analytics Matters for Shopify Owners
Analytics isn’t just a tracking tool. It’s your guide for making smarter decisions. With it, you’ll know:
Which traffic sources bring the most visitors
How customers move through your store before buying
Which products attract the most attention
Where people drop off in the buying process
Armed with this data, you can adjust marketing campaigns, improve product pages, and scale faster.
Step 1: Create Your Account
Head over to Google Analytics and create an account for your Shopify store. This sets up your data stream — the connection between your site and Google’s tracking system.
Step 2: Install the Tracking Code
Instead of using apps, you’ll place the tracking code directly into your Shopify theme. This avoids slowing down your store and ensures clean tracking.
Step 3: Test Your Installation
Once the code is in place, it’s important to test it. Google Analytics will confirm when your tag is working, and you can verify that your store is sending visitor data correctly.